How it works
A Raspberry Pi 5 core that sees, hears, glows, and runs local models — inside a shell you can open, repair, and restyle.
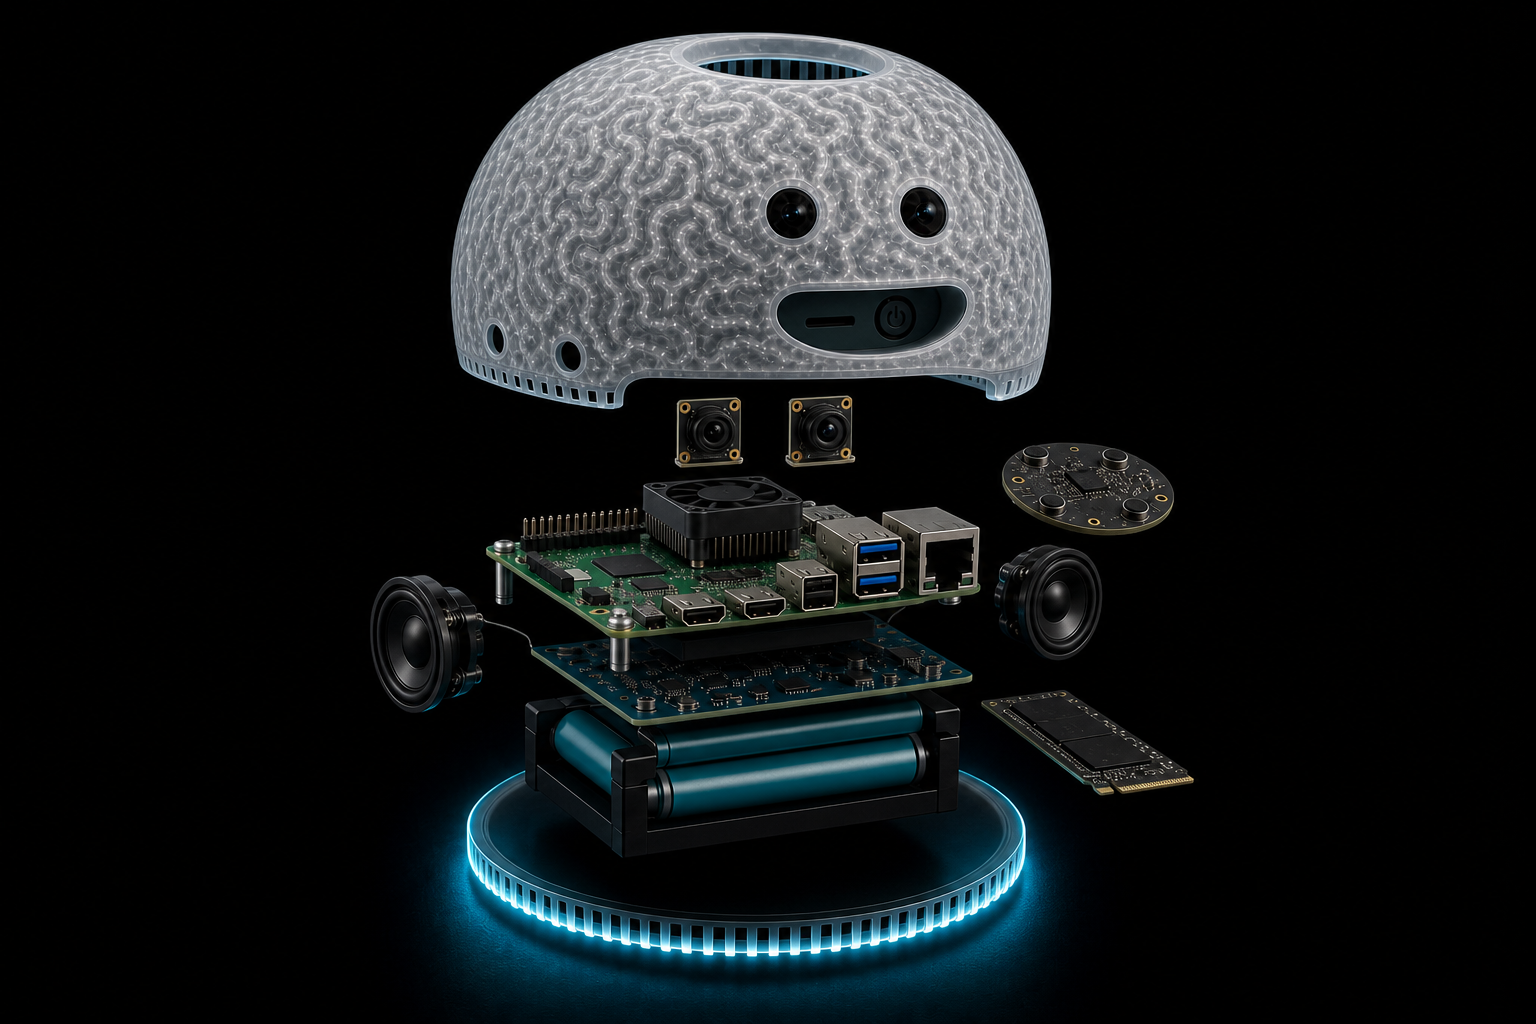
Reading the exploded view
- Two face cameras — dual Camera Module 3 eye pods. That is the default vision pair on every BRAIN.
- ReSpeaker XVF3800 — the round far-field mic array near the front of the stack (USB four-mic board), separate from the glowing base LED skirt.
- Speakers sit left/right at the temples; NVMe rides under/alongside the Pi; batteries sit in the X1200 UPS carrier beneath the board stack.
Inside the core
- Raspberry Pi 5 16GB with official active cooler
- microSD boot; NVMe for models and video on BRAIN/MAX/OMNI; Hailo-8L on dual M.2 for live vision while chatting
- Geekworm X1200 UPS — power via X1200 USB-C when installed
- ReSpeaker XVF3800 four-mic array (crown, facing up)
- 5W/4Ω speaker on the mic board’s own amplifier. Mono by design: the XVF3800 cancels its own voice out of the microphones so you can interrupt it mid-sentence, and that only works with one reference channel. Bluetooth headphones still get full stereo.
- ~24–30 NeoPixels in a bottom U-channel (brightness limited in firmware)
Ports & orientation
Front is face and mic. Side A is video and power-in. Back is Ethernet and USB.
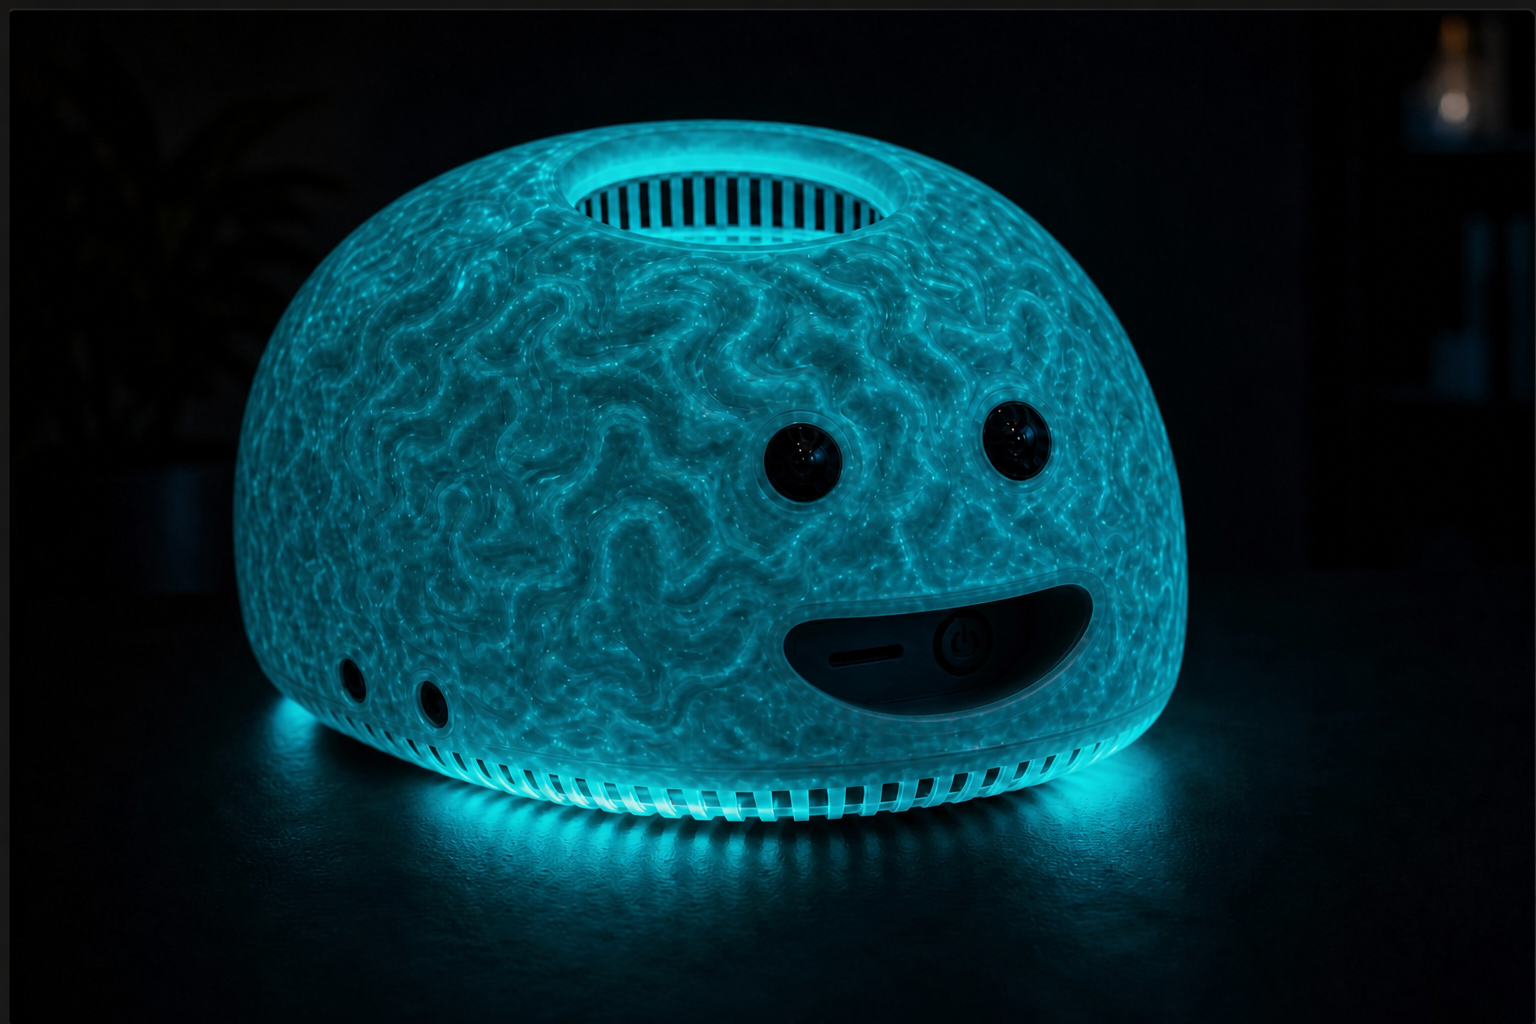
Front — face & access
- 1Dual CSI camera eyes — Small round modules; spacing can vary by edition.
- 2Mouth cutout — Finger-access opening for power and storage — not a painted smile.
- 3Power button — Inside the mouth cavity.
- 4TF / microSD slot — Inside the mouth cavity, next to power.
- 5Far-field mic array — Front landmark; bottom sound holes near the mic.
- 6Crown cooler vent — Open top over the Active Cooler exhaust — never capped.
- 7Base LED ring — Bottom-up glow through the vented skirt.
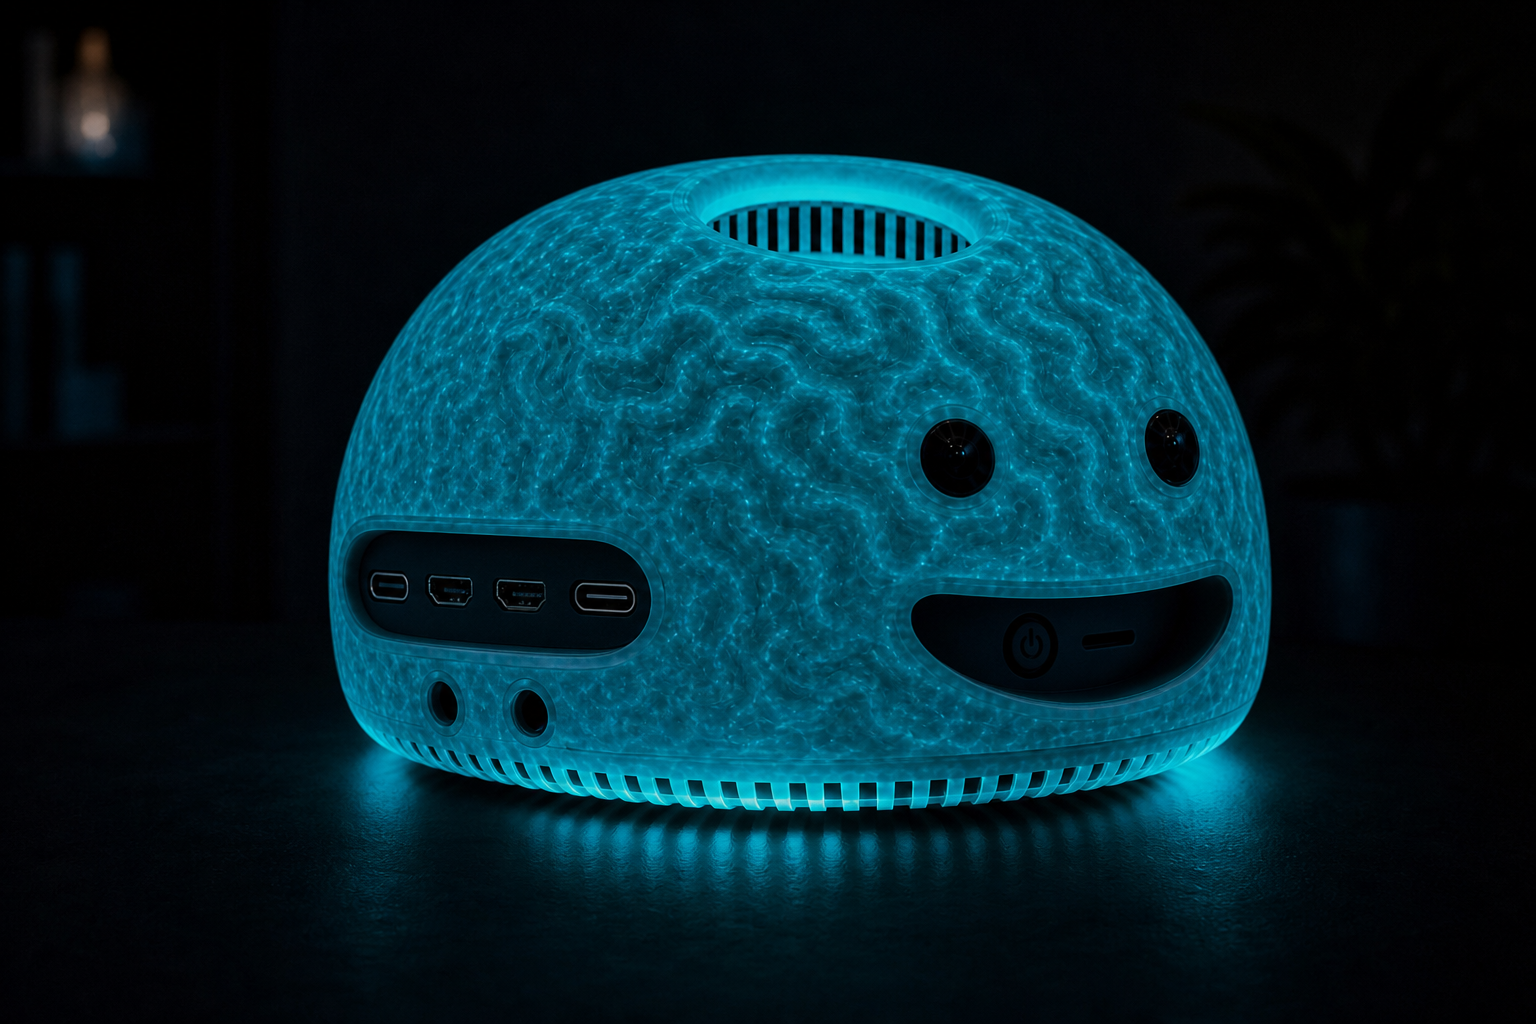
Side A — video & power-in
- 1USB-C (X1200 power-in) — Charge / power the UPS stack — use this USB-C, not the Pi’s.
- 2USB-C (service / data) — Host/service path on the side panel.
- 3micro-HDMI × 2 — Dual display out from the Pi 5.
- 4Aux / sensor jacks — Circular side openings for harness exits (edition-dependent).
- 5Side air slots — Convection path along the shell.
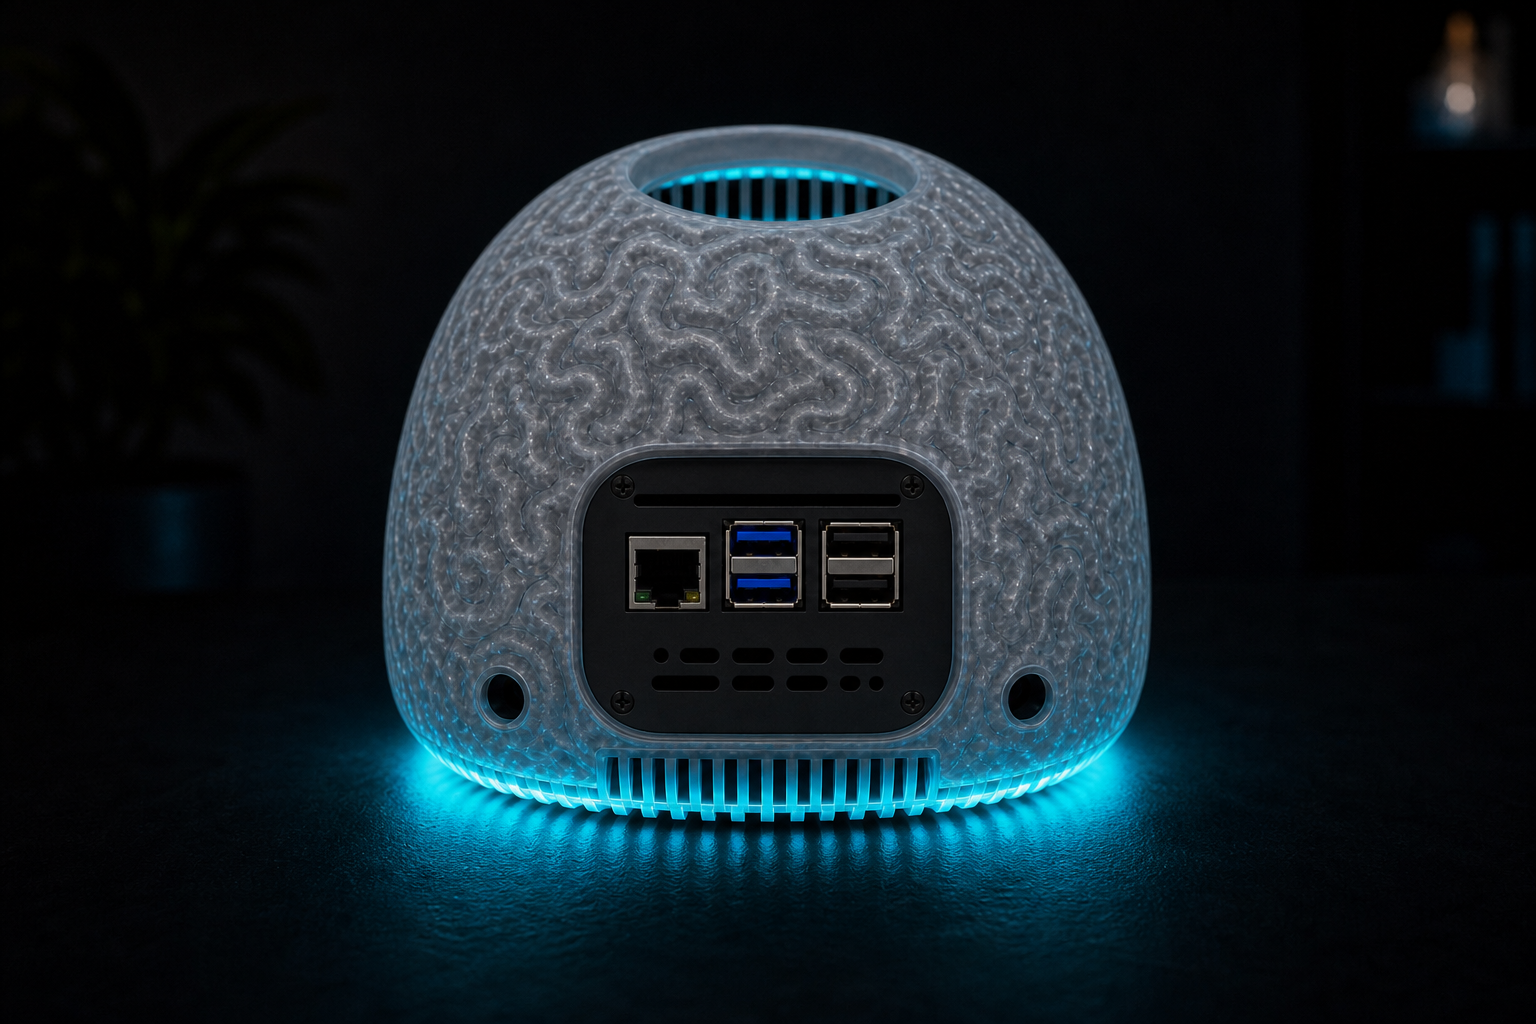
Back — network & USB
- 1Ethernet (RJ45) — Wired LAN with status LEDs on the jack.
- 2USB 3.0 (blue) — High-speed peripherals — mic array, storage, GPS puck.
- 3USB 2.0 (black) — Standard peripherals and accessories.
- 4Alternate camera / sensor holes — Circular bays for rear cams or blank plates.
- 5Rear grommet path — Soil probe / STEMMA cable strain relief.
- 6Occipital air opening — Keeps the stack cool while exposing the port panel.
More than a single app
Inside is a Raspberry Pi 5 computer — local models, vision accel, and storage — so the device can host other software you choose, not only theBRAIN’s first-party stack.
- Coexist — install additional services on the OS; they are designed to run alongside the edge agent.
- Allowlisted skills — when you want the brain to control another tool, grant a narrow API or MCP permission in Scooling (planned Tools / Permissions surface).
- Still knowable — those grants and runs are intended to appear in the Scooling control plane, next to pairing and safety — including uses beyond learning.
Developers & buildersSensors, docks & add-ons
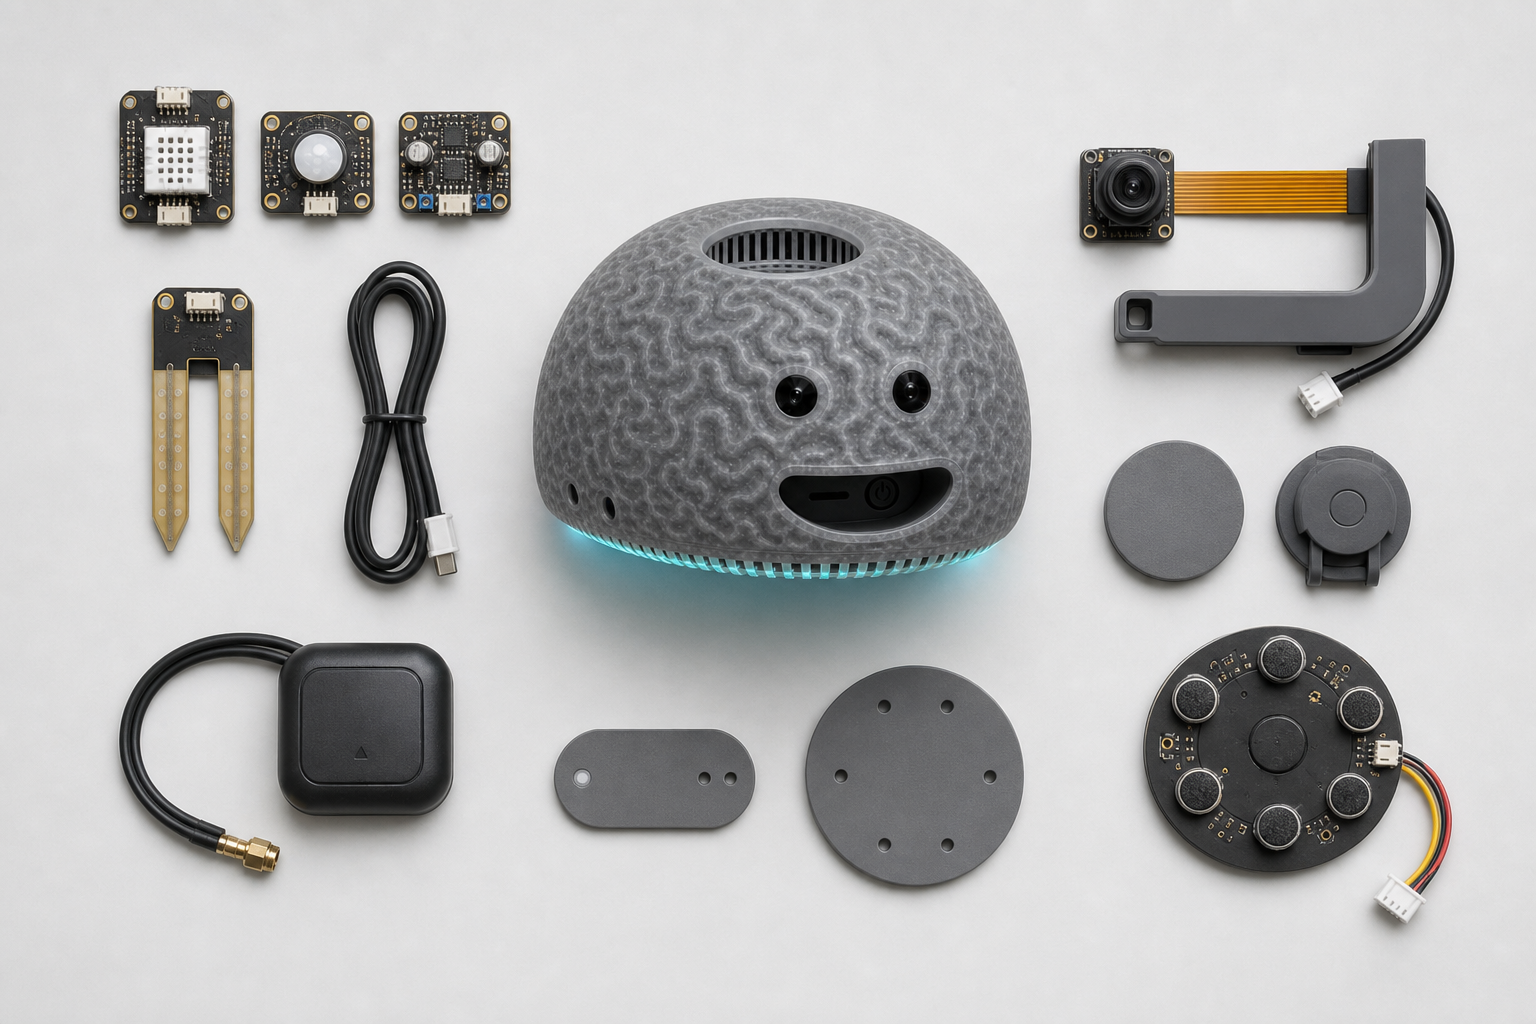
Side B is not a second face — it is where optional sensors and slim vision docks mount. Climate, light, soil, GPS, and blank plates share the same lattice and STEMMA paths. Higher models show more docks populated; lower tiers stay clean.
- Slide-and-clip side docks for optional lookouts or night pods
- STEMMA climate / light / soil sensors away from cooler heat
- GPS puck and archive kits as USB / storage expansions
- Motion3D (Camarray) is a separate CSI stereo HAT for synced depth video — not a second M.2 module on the Hailo / NVMe hat
- Blank plates when a bay is unused
See the model ladder